Tired of
lengthy page building?
Try GemPages to create pages faster and smarter with AI-powered feature.
Try GemPages to create pages faster and smarter with AI-powered feature.
Exclusively for users making any first payment from Oct 1st to Dec 31st 2023, UTC.
Discount applied automatically at checkout.
Thank you for subscribing.
You will be the first to know about new releases, giveaways, special projects, and everything we promised.
Your email is already used.
Looks like you already signed up for GemAcademy Premium using this email address.
Stay in the know
Subscribe and you'll be the first to know about Shopify news, profitable store ideas, helpful guides, product updates, and more.

As the market is becoming increasingly crowded, consumers face the paradox of choice. Having an abundance of options can actually leave customers feeling overwhelmed and confused.
These changing customer sentiments are forcing many brands to rethink their business strategy.
Instead of going for a scattergun approach and selling a vast product range, many upstarts choose to pare back their line to a single "hero" product. Taking one product strategy allows brands to be laser-focused and niche, zeroing in on customers' specific wants and needs.
In this article, we've rounded up several top one product brands we think are the best to have on your radar as you consider creating your own one product Shopify store in 2024.
But first, let's make sure we are all on the same page in terms of what a one product Shopify store actually means.
A single product store or one product store is an e-commerce website that sells only one product or a closely related set. It focuses on showcasing the product's unique features and benefits, providing a simplified shopping experience. These stores target niche markets and aim to maximize sales potential by emphasizing a single offering.
Crocs, Casper, and Spanx, to name a few, are some of the most well-known brands that have built their empire based on "hero" products and later expanded into new categories to reach more customers and flesh out assortments.
Learn more: 24 Best One Product Store Ideas You Should Check Out in 2023
Amidst the multitude of one-product stores, keep these 6 criteria in mind to transform your store into a successful one-product Shopify venture in 2024.
Learn more: 7 Best Single Product Shopify Themes in 2023 (Free and Paid)
We recommend 18 top stores that we believe are excellent sources of inspiration for both store design and effective business management through marketing strategies. It's worth noting with pride that many of these cases have been enhanced by GemPages, resulting in increased user-friendliness, mobile responsiveness, and a focus on driving conversions.
Cookie Chips stands out as a unique one-product store on Shopify, specializing in the delectable world of cookies. Leveraging GemPages, the store is dedicated to providing consumers with a seamless and captivating user experience, placing a significant emphasis on showcasing its irresistible product.
Upon entering the site, users are greeted by a clean and organized interface, featuring an array of cookie options right on the homepage. This user-friendly design allows customers to effortlessly commence their purchasing journey directly from the homepage—an effective strategy known to boost sales in single-product stores.

Setting itself apart, Cookiechips recognizes the pivotal role visuals play in influencing customer purchase decisions. The store goes above and beyond by presenting double-sided motion images.
This innovative approach allows buyers to simultaneously view the enticing packaging on the front and peruse essential information about ingredients and calories on the back. This not only enhances the customer experience but also provides a swift and convenient way for customers to gain a comprehensive understanding of the product.

Fybelle's homepage gives off a feminine vibe
Fybelle is a single-product brand whose target audience are young women. From a visual standpoint, everything about Fybelle's homepage gives off a feminine vibe—from the primary pinky color and photo shoots featuring female models to the vibrant, energetic video.
This is the featured product video on Fybelle's homepage:
The clear call to action here is adding this Fybelle IPL handset to your body care routine, but if you're still unsure, there's a cost comparison between Fybelle and other traditional hair removal treatments. As you can see, you'll get the most bang for your buck if you go with Fybelle.
WaveBeamPro is a high-performance headlamp brand specially designed for enthusiasts such as hikers, campers, runners, and adventurers. The combination of two contrasting light and dark shades, along with a modern and clean style, makes it easy for visitors to understand the product's features at a glance.

The discount information is prominently placed at the top of the homepage, along with a clear call to action, which serves as a hook to attract customers.
The WaveBeamPro homepage also includes customer testimonials and reviews, demonstrating the brand's confidence in its product and providing value to customers. By showcasing positive feedback from satisfied customers, the brand builds trust with potential buyers, encouraging them to take action.

It is designed with details on the products’ specifications and technical information, including a comprehensive comparison to the traditional headlamps. The superior information about the product will greatly convince visitors to purchase.


Kulala Land uses vibrant colors to its advantage. But the colors aren't just limited to backgrounds and product images. Even the fonts are colorful and give off a pleasant, youthful feeling.

Across the homepage, the brand also displays customer reviews, the founder profile, and a FAQ section to increase product confidence and eventually convince visitors to purchase.


State of Kind, a single-product skincare brand, mirrors its "do more with less" philosophy through a clean, minimal, and simple site design. It uses just the right amount of text and visuals to avoid being illegible and overwhelming.

One notable thing about this store is that it dedicates a separate page named "Our Philosophy" to tell the story behind the product. This is an excellent takeaway as to how you can help potential buyers better understand your product and increase positive brand image.
When you first enter the Thinx site, it's hard to ignore its design. The brand focuses on visual presentation rather than being covered in too much text.
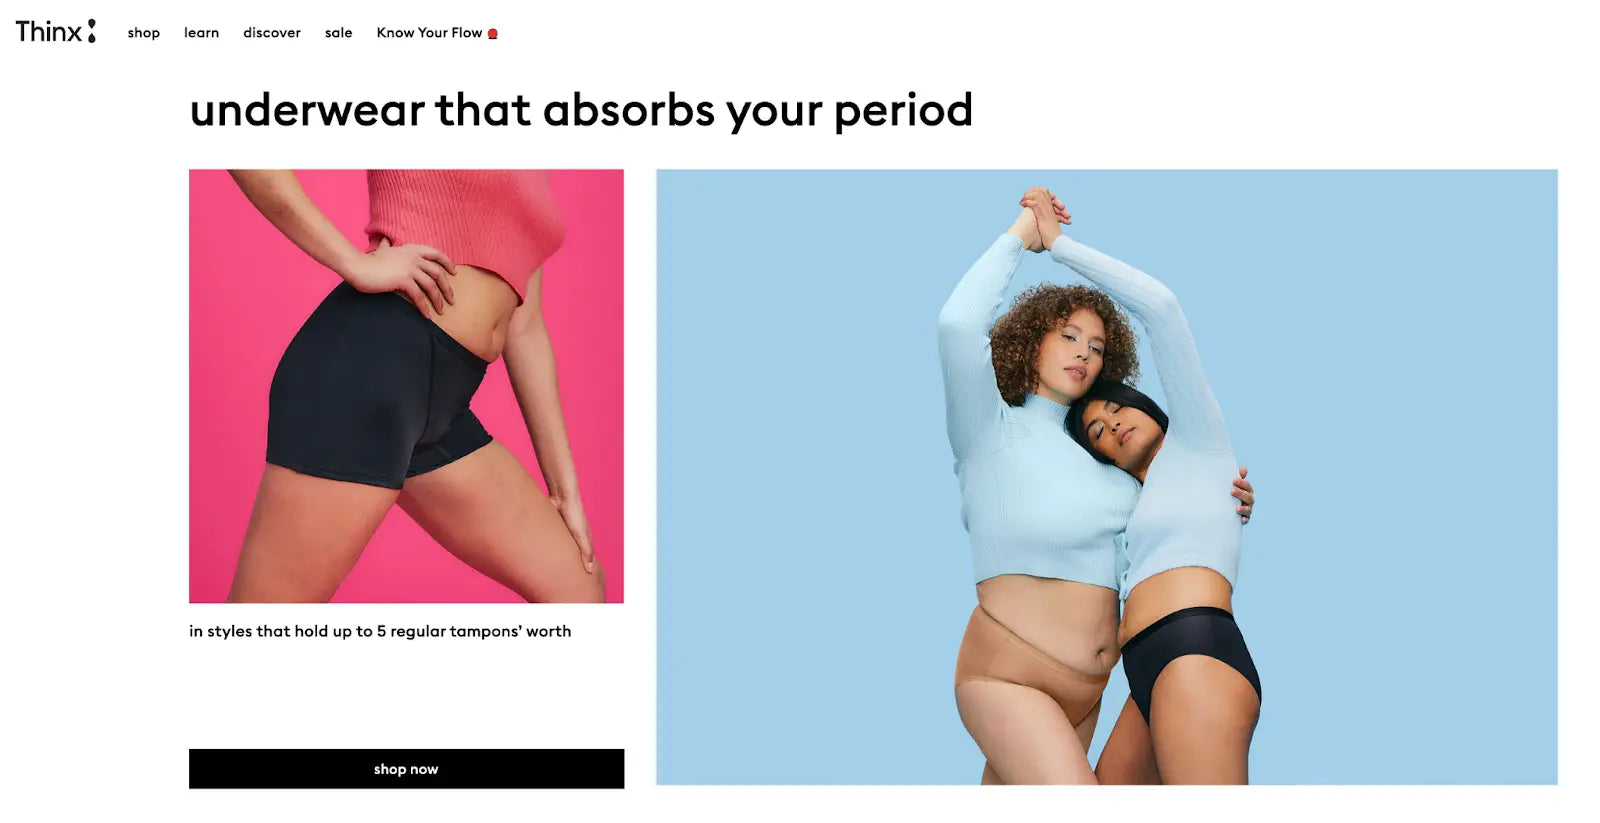
It has lots of product videos (probably way more than most one product stores out there) but nothing that would require film festival-level videography. The iPhone camera is all you need to produce videos like Thinx's!

Sure, videos won't get any standing ovations. But they do help to increase conversion rates. According to Wzyowl's latest video marketing report, 88% of site visitors say that they’ve been convinced to buy a product or service after watching a brand’s video.
No crazy efforts, but these small touches can revolutionize your Shopify one product store and your sales, too. So, why still roll your eyes at the idea of doing videos?
Bokksu, a Japanese subscription-based single product store, does a great job presenting its solid brand identity via its website.

The branded color orange is everywhere throughout the site—in the header section, hero banner image, product shots, text, and CTA buttons. This visual consistency creates a memorable experience that encourages customers to associate the color orange with the brand.

What's more, the brand also has a short video on the homepage explaining why Bokksu is selling an experience, not just products. By subscribing to Bokksu, you can learn, taste, and experience Japanese culture from the comfort of your own home.
It doesn't take much to explain why this single-product website works. The whole page is clearly organized—plenty of white spaces, succinct copy, and appropriate images.

Brew Blue built a very professional-looking one product Shopify store
Across the homepage and product page, the brand Brew Blue includes a few core components to help shoppers decide if they want to make a purchase:
An one product Shopify store typically has, at minimum, five pages: a homepage, a product page, a checkout page, a contact us page, and a shipping and return policy.
But, Brew Blue builds out its website further with a blog page. As you click on the navigation menu in the top left corner, you can find a hub of helpful information about product ingredients, skincare knowledge, and more.

PillowPup's target audience is people who love dogs and who like lovely souvenirs, and its online store resonates with that audience.

First off, PillowPup puts many cute photos of fluffy friends on the site, from the hero banner to the product images.

The brand also explains the creation process using cute dog icons, emojis, and informal language that speaks to its target audience.
BlendJet is a dropshipping store that sells blenders for making smoothies and drinks.
The first thing instantly attracting visitors' gaze when landing on BlendJet's page is the hero section that includes a full-screen video. The BlendJet 2 comes in many vibrant colors and patterns, showing the pleasure and ease of drink prep. The colorful, freshening visual gives customers the feeling of freshness and desirability of owning a portable blender.
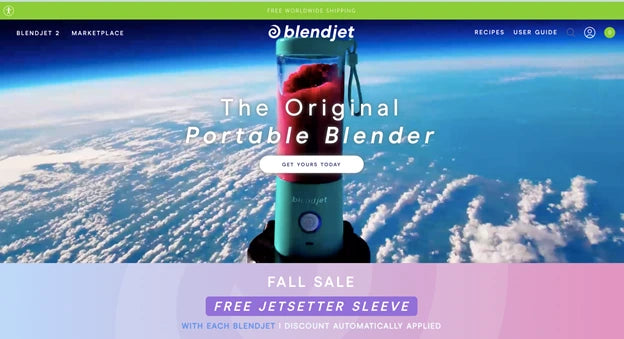
The homepage features a well-organized grid layout with sections dedicated to product display, user testimonials, and frequently asked questions. The pastel color is consistent with the brand's identity, utilizing a blend of cool and warm tones that highlight the product and create a visually pleasing interface.
 BlendJet keeps things simple. Fancy, easy-on-the-eyes typography has done its excellent job.
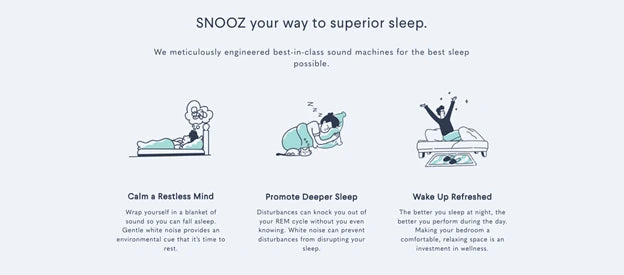
Scrolling down Snooz’s website is a pleasurable experience. Snooz embraces a clear focus, intuitive design, and persuasive sales pitch. The design of the website, featuring the clever use of white spaces, is ideally on point with its branding, which brings peace and calm vibes, like a lullaby to your eyes.
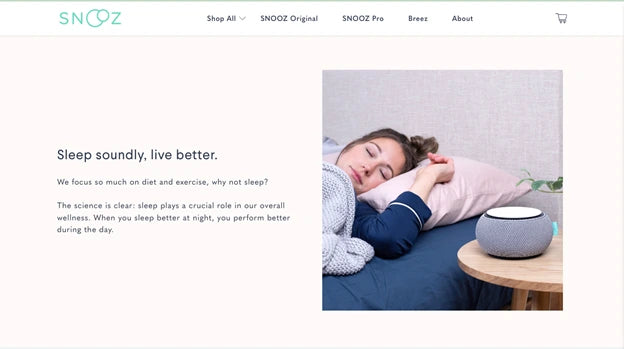
The copy is also the secret sauce that makes Snooz’s website stand out. A collection of clever taglines will make you go “Wow". By this way, Snooz conveys its heartfelt promises of restful sleep impressively.
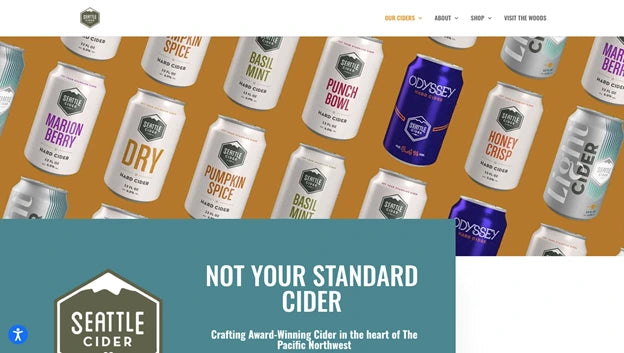
The diagonal style and playful design do an excellent job of visually showcasing their products and speaking the Seattle Cider's identity. Just scroll and you will love how the infographic for the process section animates.
Smoovii is a website selling smoothie blenders. The captivating background photo immediately catches your eye, while the simple web design and seamless page navigation provide a browsing experience that feels like a treat.
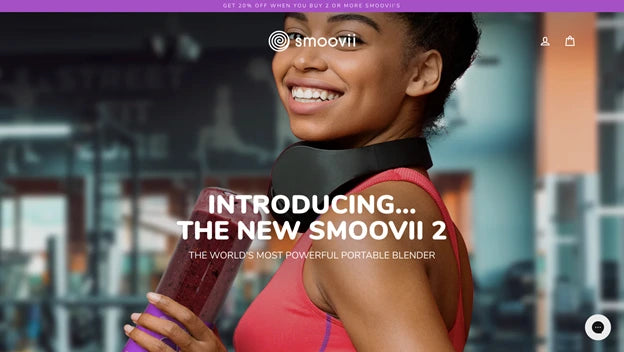
The website uses high-quality images of their smoothie blenders. The font style perfectly matches the brand’s aesthetic.
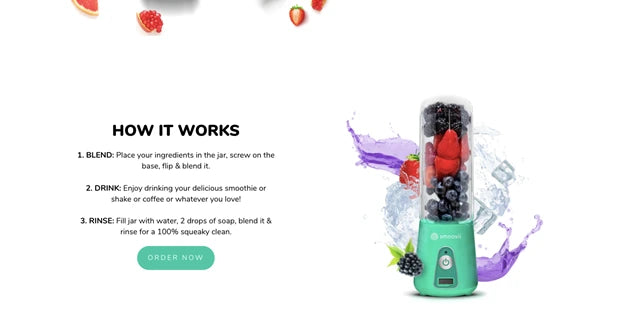
Smoovii doesn't just sell products, they also offer healthy smoothie recipes and show you how to make the most of their amazing blenders.
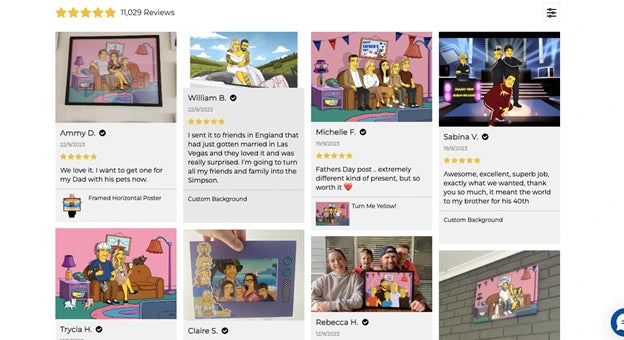
Turned Yellow specializes in selling personalized Simpson-style portraits through a print-on-demand service. The website design stands out with its playful and fun look, giving off the vibe of a comic page rather than a typical product page.
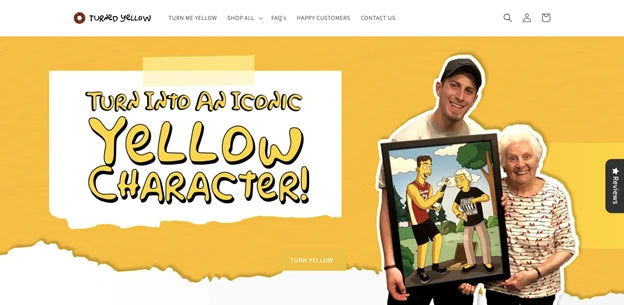
As a platform that offers personalized print-on-demand products, Turned Yellow smartly showcases customer reviews on its homepage to provide social proof and build trust.
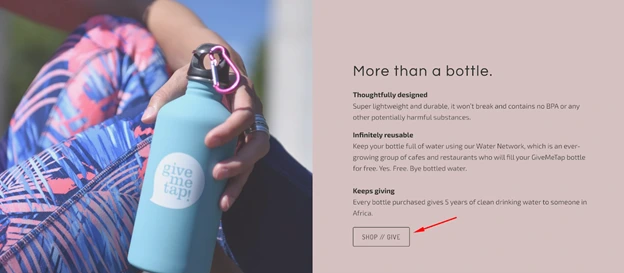
GiveMeTap not only sells bottles but offers a meaningful story. On the Give Me Tap homepage, a prominent hero banner showcases clear Calls to Action (CTAs), inspired by this rewarding narrative. The standout feature is the "Learn More" button; when clicked, it guides you to the story of environmental protection and providing clean water to communities in Africa. Positioned alongside the "Shop Now" button, it conveys a compelling message about how purchasing a bottle can impact lives positively.
 A good business has a rewarding story.
With a mission to provide clean water to Africa, all elements are consistently designed to convey this message. Most CTAs follow a pattern like "Shop-Give."
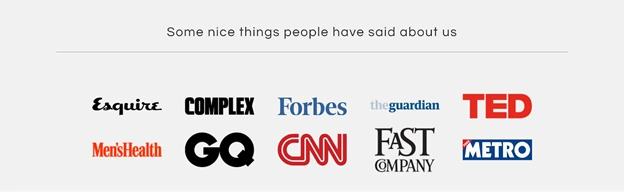
Furthermore, the store excels in featuring press mentions, enhancing its trustworthiness and reliability. Customers can sense that buying bottles from this store is a meaningful contribution to helping the people in the hottest continent.
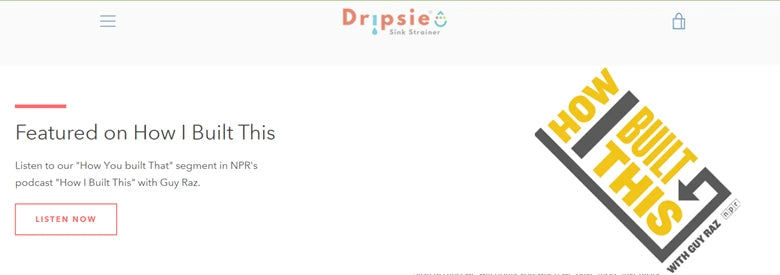
Dripsie exclusively sells kitchen sink strainers, and its homepage clearly communicates this from the first glance. A simple yet illustrative image effectively conveys the essence of the entire business, complemented by a contrasting color for the CTA button. A noteworthy aspect to learn from this store is its streamlined navigation bar, precisely directing visitors to the information they seek."

As you scroll down, you'll notice that the narrative behind this business is easily accessible with just a click; you can listen to it in a podcast. This storytelling approach is considered intriguing for showcasing the inspiring story, vision, and values of the business.
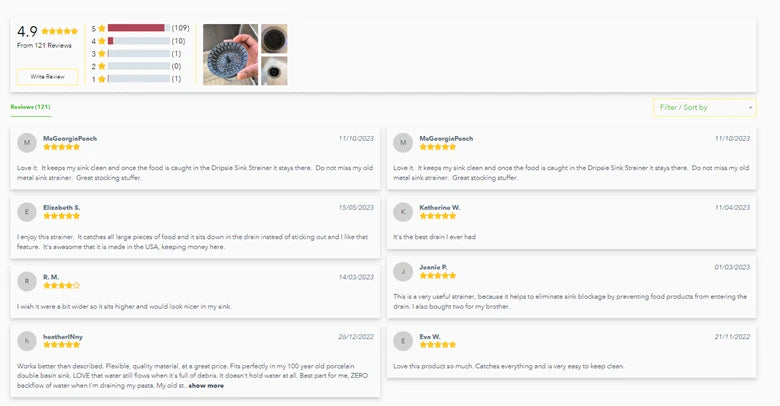
Notably, as a typical single-product Shopify store, it doesn't have an extensive product list. This intentional simplicity provides an opportunity to prominently feature product reviews, enhancing customer trust in their offerings.
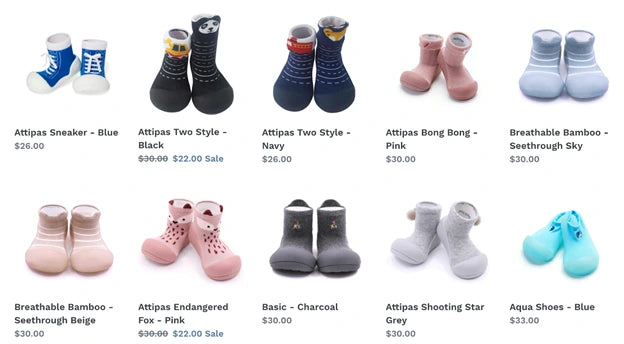
Attipas has gained recognition for its sales of children's shoes featuring rubber soles. These shoes, endorsed by Australian podiatrists, are designed to mimic the experience of walking barefoot. Serving as a combination of shoe and sock, Attipas shoes come in a diverse array of sizes, colors, and patterns. The promotional efforts for these shoes highlight their benefits for young children and those in the early stages of walking.
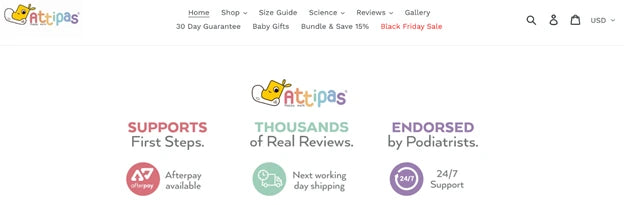
Attipas has effectively engaged in self-promotion through various social media platforms. The brand has been featured in publications and television appearances. Additionally, their website frequently provides promotional codes and monetary incentives to new customers who subscribe to their mailing lists.
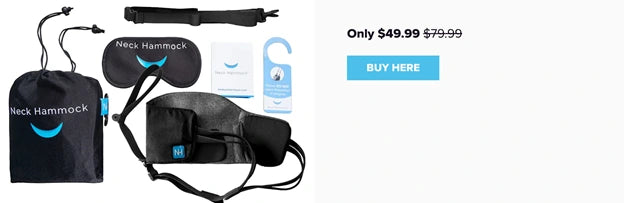
Neck Hammock has claimed that its device offers consumers a straightforward routine for alleviating neck and head pain. Furthermore, their focus extends beyond influencer marketing. Upon visiting their official website, you'll find numerous positive product reviews penned by genuine customers.
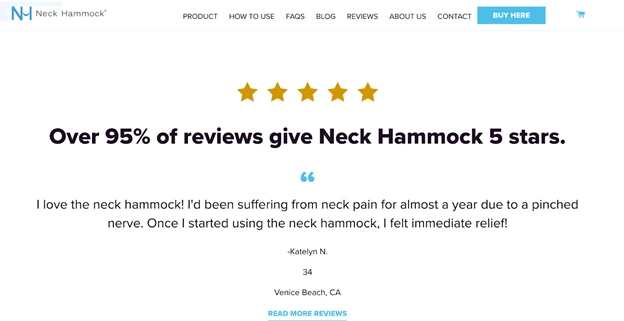
Moreover, their Shopify site, dedicated to selling a single product, consistently processes orders efficiently. Due to the convenience of producing the product in a free size, the company may provide bundle deals to encourage customers to purchase more than they initially require. The Neck Hammock proves to be an excellent choice if you're looking to gift someone who experiences neck pain.
A multiple-product store needs multiple Shopify product pages. Meanwhile, a one product Shopify store is dedicated to a single product, thus, most of the time, one product page would suffice.
The fewer pages your store has, the less effort and time you'll spend creating, customizing, and optimizing them. It's a fact!
You simply have to figure out what you want to sell, create store pages quickly with a drag-and-drop page builder, and then start marketing.
If you're going to be selling just one thing, you should make sure that the product you choose is really, really good.
But how do you decide that one perfect product for your store?
Scott Hilse, an entrepreneur who successfully built a six-figure eCommerce business by selling just one product, shared some golden rules for choosing the "hero" product.
Rule 1: "I would never ever ever sell a product that I could get at Walmart or any average store that's around. I go for impulse buys."
Rule 2: "Find a product that most people haven't seen before and make for a good video. Especially starting off, you don't want to start with a really boring product. You want something that's fun."
Rule 3: To narrow down product choices, think of the potential of the market. What's something that a lot of people have? What's something they use every day?
You also need to execute product research.
Stay calm! Product research doesn't necessarily mean something complicated or full of data.
It can be as simple as checking Google Trends to see whether there is demand for the product you're about to sell.
Or, join Facebook groups, check out Pinterest boards, Tiktok videos, Instagram hashtags, and look at the social media profiles of your target audience.
If your product meets all the rules above and answers a specific need, you might have a winner!
Learn more: 15 Best Products to Sell on Shopify in 2023
Once you've determined which product to sell on your one product Shopify store, it's time to build your store so you can start making money online.
Here's how you can create your one product Shopify store:
Shopify is the best eCommerce platform on which you can build your very own one product store. This platform offers an extensive library of mobile-responsive, sleek, and eye-popping themes.

Whatever industry you're in and whatever product you wish to sell in your Shopify one product store, you will likely find a theme that lives up to your expectation.
Learn more: 7 Best Single Product Shopify Themes in 2023 (Free and Paid)
Next, you need to add the sole product to your store.
Adding products to your Shopify store is a very straightforward process. Shopify provides you with all the fields; you just have to fill them in with the corresponding information.
However, you don't need to enter every product detail right off the bat. You can fill in the most crucial ones first, and add more information as you go.

Important note: For your product information to be displayed in full length in search engine results, you should keep the product title under 70 characters and the product description under 320 characters.
Congrats! Now you have a bare-bones store. It's time to add some bells and whistles to enhance the allure of your store and showcase your single product.
Using a visual page builder like GemPages is the easiest, quickest, yet most effective way to further customize your store pages.

GemPages empowers you to create, customize, and optimize your store pages for conversion. No coding required!
Whether you want to launch promotional campaigns to cash in on key shopping seasons or compelling holiday-based campaigns fitting the joyous occasion, GemPages can help you accomplish all these!
With an excellent rating of 4.9 out of 5 from 3,130+ reviews, GemPages has proven to be a trusted Shopify app for thousands of Shopify merchants and brands.
Never put all your marketing eggs in one basket. In other words, go for a multichannel marketing strategy.
Let's say you've added three marketing channels to your business. That's three more funnels. Three other ways to reach new customers. Three more places for your product to strut its stuff. Of course, that also means more work and effort.
Begin with social marketing strategy. Build the business profile on social platforms like Facebook, Instagram, TikTok, etcetera.
Next, connect your Shopify store with these platforms so that you can sell on both platforms simultaneously.
The good news is Shopify allows you to connect your online store with multiple platforms like Facebook, Instagram, Pinterest, Youtube, and TikTok. This means you can add shopping tabs to your social profile or link directly to your product pages.
Learn more:
How to Connect Your Shopify Store to Youtube?
How to Set Up The Shopify eBay Integration?
How to Connect Shopify to Instagram in 6 Easy Steps
We also recommend you try out influencer marketing. It's the best way to reach new audiences, build brand awareness, and work with collaborators who can create viral content and make sales for you.
Learn more: Shopify Collabs: What Is It and How Do You Use It?
In theory, a single-product brand takes less effort to build and manage on a daily basis.
But if you think it's always easier said than done, same. So how are you supposed to do?
Besides a winning "hero" product, here are the can't-miss ingredients that come together to create a profitable one product Shopify store:
Here's a hard fact: Visuals are much easier to perceive than plain text.
Appealing visuals can not only complement your copy, but they can also be the critical factor to keep the visitors staying on page.
Impress your visitors right when they land in your store by displaying the most stunning product image or video in the hero banner.
Consider using carousels, parallaxes, and 3D images too, as they can take the visuals of your store to the next level, bringing about a unique, immersive shopping experience.
Learn more:
Shopify Product Images: A 10-minute Guide for Beginners (2023)
The A-Z Guide on How to Add Video to Shopify Product Page
Most customers (other than your family and friends) aren't buying from you because they love you. They want your product to do something to change their lives for the better. Hence, your one-product store page should make it easy for them to see how your product can do that.
But it doesn't mean you should get all the features onto your page. Avoid slipping into boring bullets and uninspired walls of text.
Consider creating a detailed FAQ page to quickly answer some of the most popular questions or concerns your customers may have.
Some of the best one product Shopify store examples that we've just shown you even dedicate a separate About us page to tell their brand's story. Just another way they utilize the power of storytelling to enhance their brand identity.

Made of Memories dedicates a separate page to introduce their brand mission, values, and core team members.
McKinsey research has shown that peer purchasing insights have more influence on consumers' buying decisions than any marketing strategy.
As a store merchant, you should take advantage of every opportunity to display positive feedback from prior customers to prove the credibility of your single product.
You can diversify your social proof to better represent your brand trust by combining reviews, ratings, testimonials, and user-generated videos.
A visitor lands on your one product Shopify store, get interested in your products, and scroll downs to explore more.
She read through a detailed yet not-at-all-overwhelming, inspirational product description and fantastic social proof. She is 98% convinced to buy from you.
But when she finally decides to buy, she can't find the CTA button. Most likely because she needs to scroll all the way up the page.
Who wants to miss such a golden chance to close the deal when your visitor already has her credit card out?
It's important that you trigger your CTA button at the right moment. If your buy button isn’t there when the visitor wants to buy, you’ll risk losing sales.
Keep your CTAs clear, direct, and goal-oriented. More often than not, direct “Add to Cart” or “Buy Now” will do.
And being pushy with multiple buttons is not the perfect solution, either. Include only one CTA button on each page to avoid distractions and ensure that you are directing the viewers to take one specific action at a time.
Learn more: 14 Effective Tips to Create Call to Action Buttons that Convert

Hopps opts for a never-go-out-of-style CTA button
Now that you have a better idea of what successful one product stores look like and how to create a one product Shopify store that converts.
Still, if you need some more motivation to roll up your sleeves and get started, take a glance at these advantages of selling one product:
That's pretty much it about one product Shopify stores. Although a lot goes into building one, by this point, you're armed with all the nuts and bolts to kick off your own one product Shopify store.
The best time to get started is always now. Stop procrastinating and start creating your dream store today!
Don't forget to head over to GemPages when you're ready to construct and customize a Shopify store that's equal parts stunning and high-converting!


© 2017-2024 GemPages. All Rights Reserved.